I’ll admit it—I did almost zero research before flying to Aruba. We were excited for a last-minute trip and just focused on getting there. So it was a surprise when, on the way back, I learned that Queen Beatrix International Airport (AUA) has a U.S. Customs and Border Protection (CBP) Preclearance facility. This was our first time clearing U.S. immigration before arriving in the United States—and it completely changed the airport experience.
What Is U.S. Preclearance?
U.S. Preclearance is a program run by Customs and Border Protection (CBP) that stations CBP officers at select foreign airports. These officers conduct immigration, customs, and agriculture inspections before passengers board their U.S.-bound flights.
If you’re flying from a Preclearance airport like Aruba, you’ll go through U.S. immigration before you get on the plane. That means when you land in the U.S., you don’t need to go through passport control or customs again—you just grab your bag (if checked) and go, or head directly to your connecting flight.
Leaving Aruba: Follow the Signs for U.S. Departures
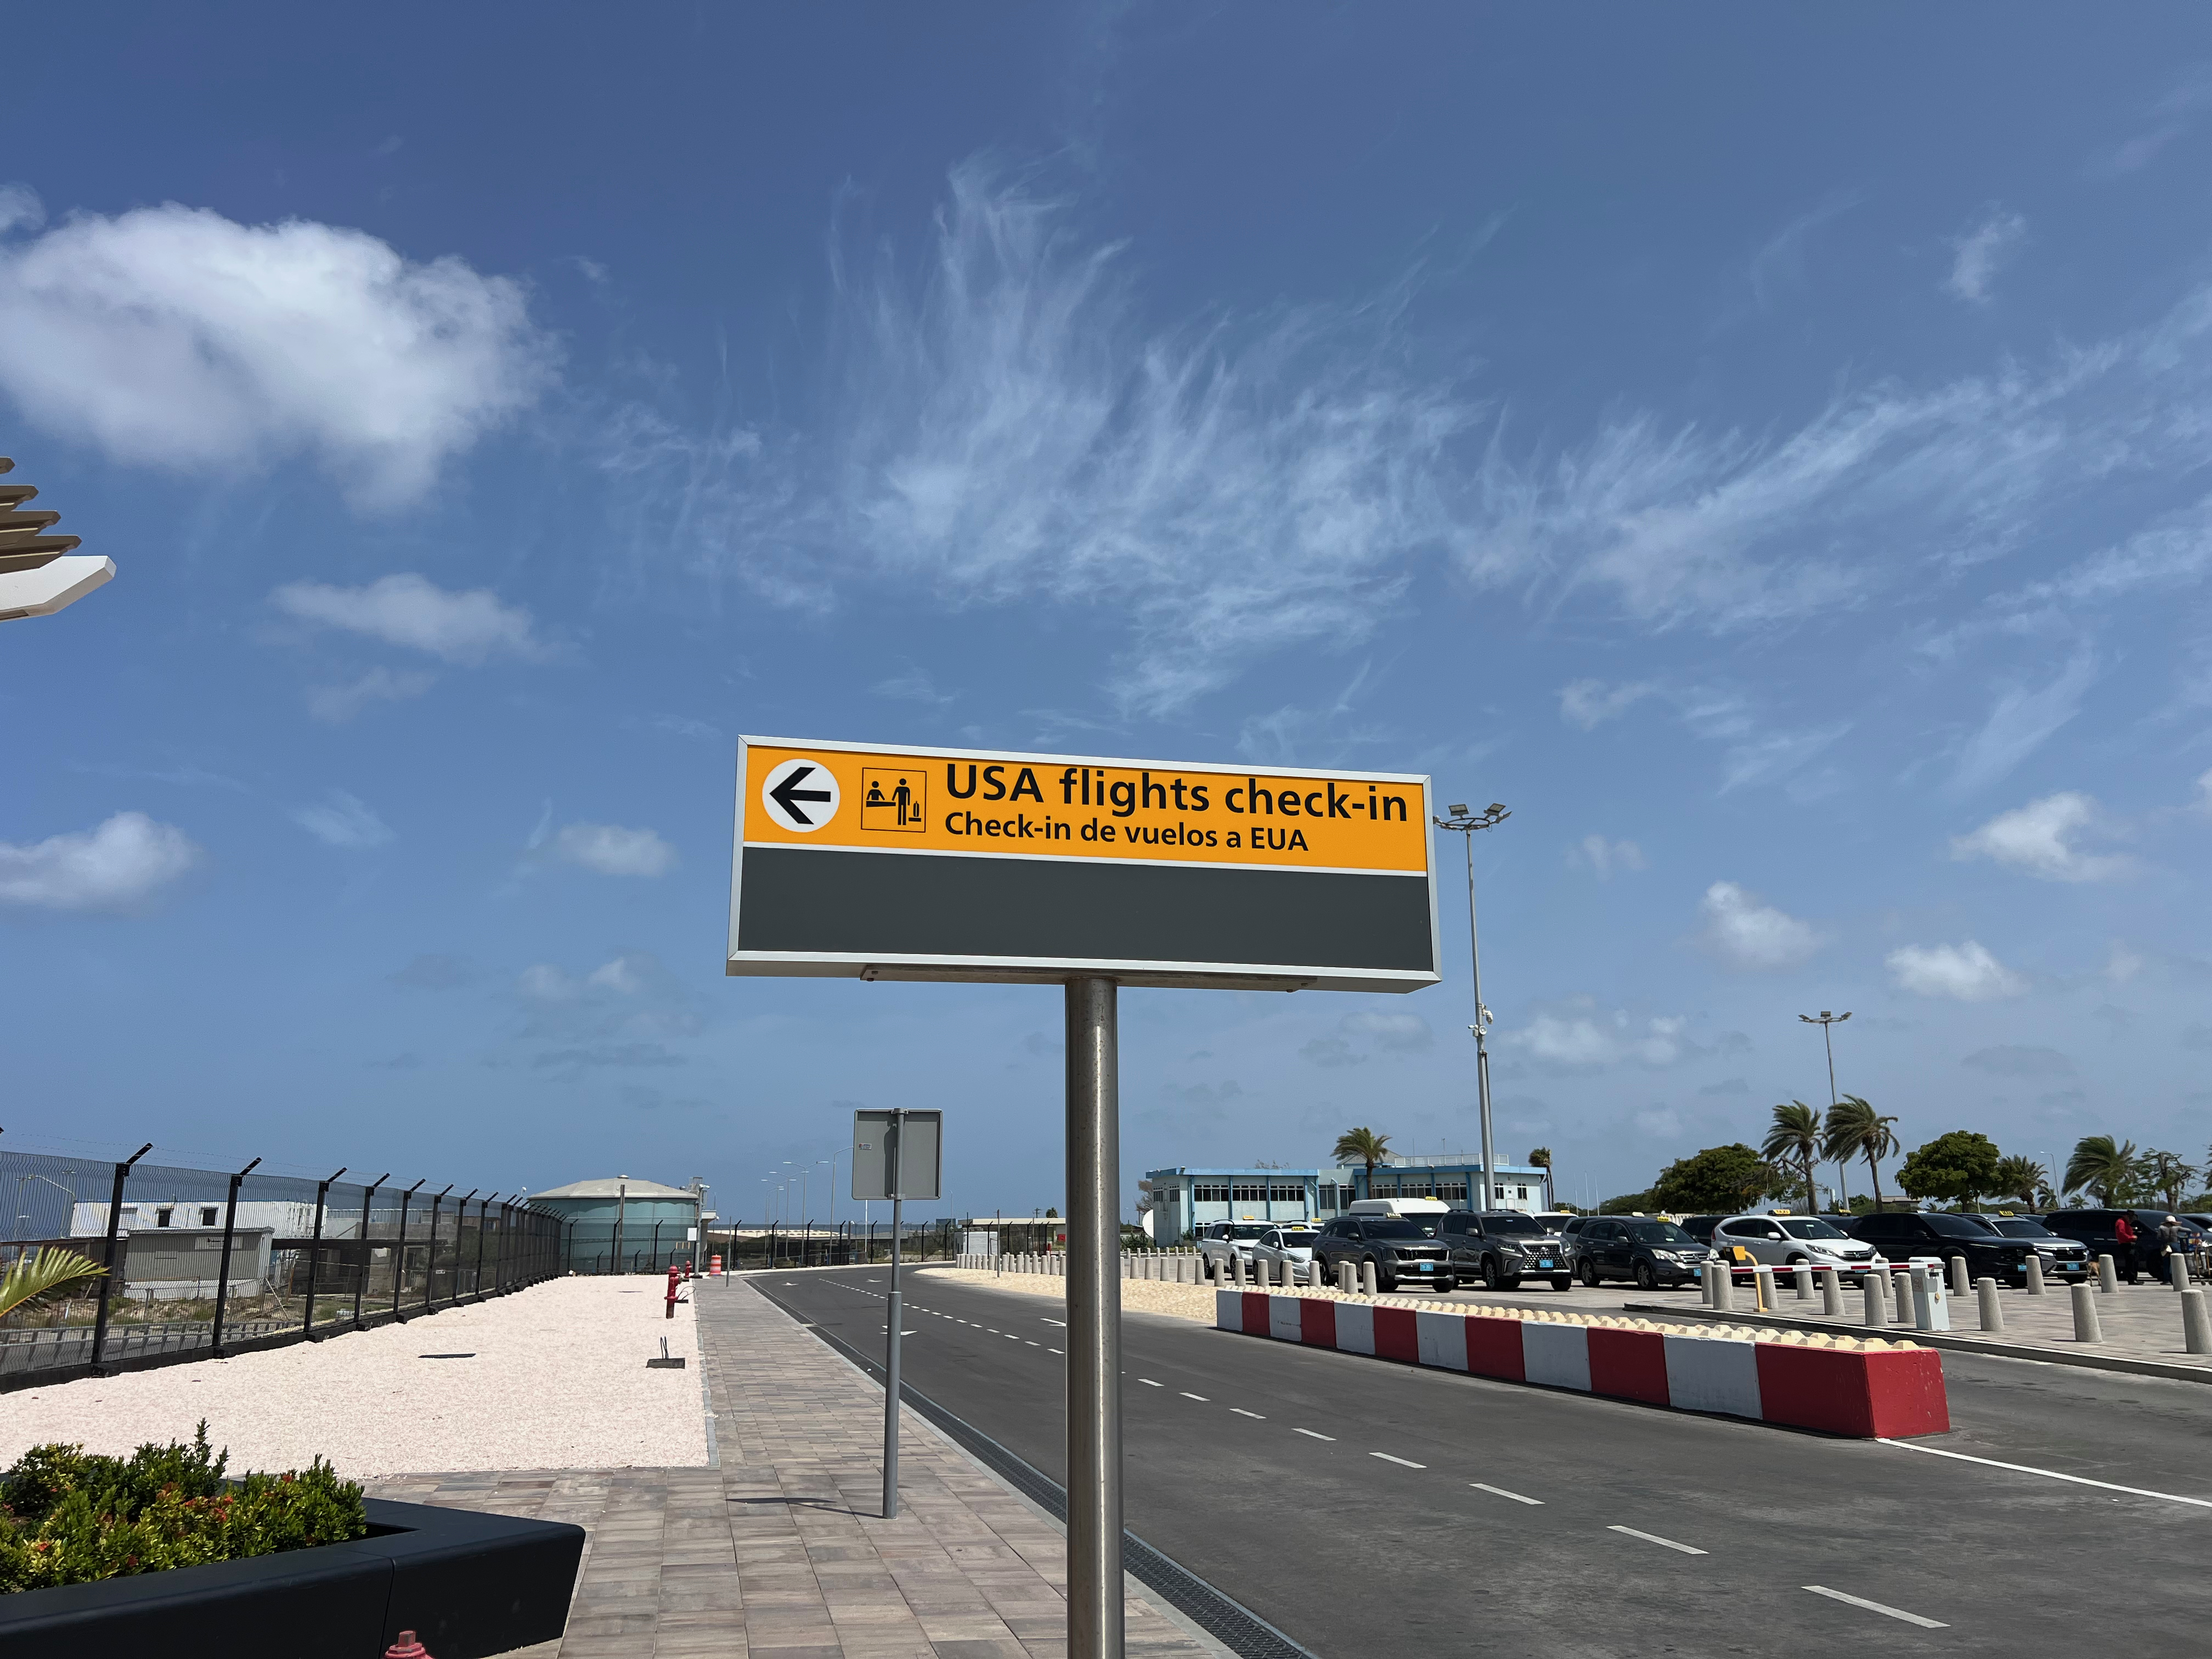
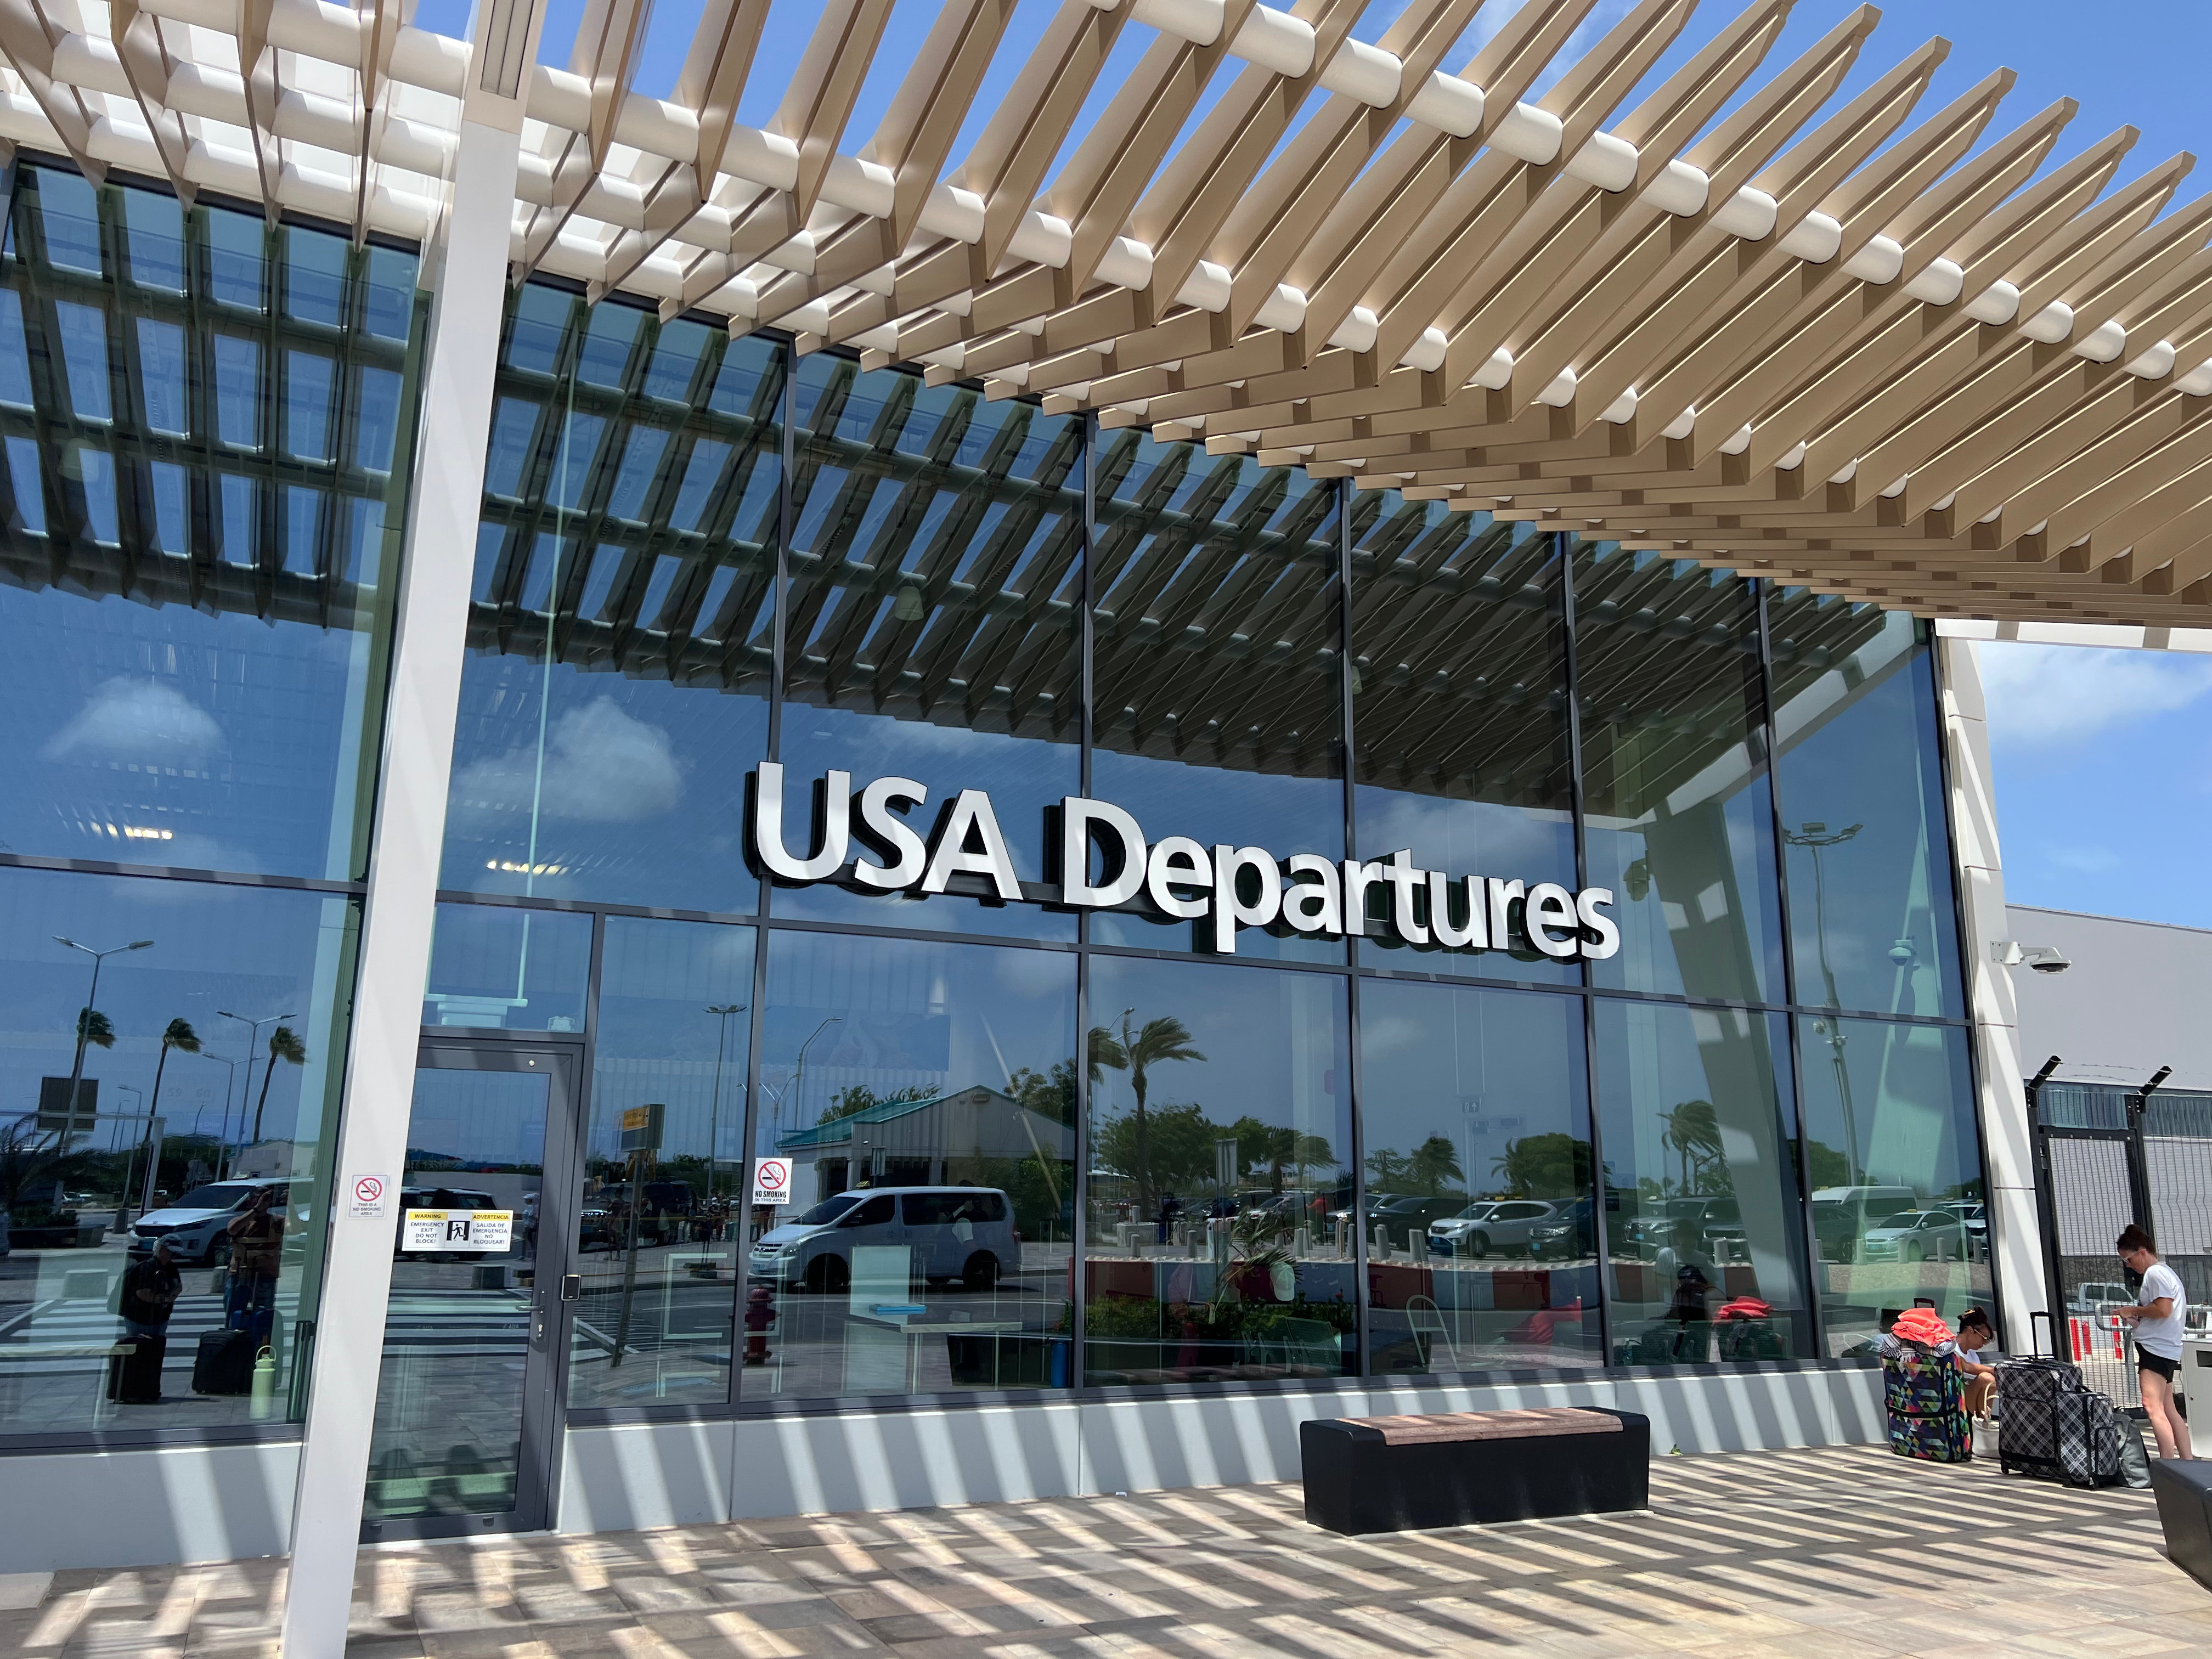
Queen Beatrix International Airport has a dedicated section for travelers flying to the U.S., clearly marked with signs like “USA Departures” and “USA flights check-in.” (You can’t miss it—literally, the building says “USA Departures” in giant letters.)
But keep in mind: you can’t check in whenever you want. You’re only allowed to enter the U.S. Departures check-in area no more than three hours before your flight. Access is managed based on your flight’s departure window, using a color-coded system:
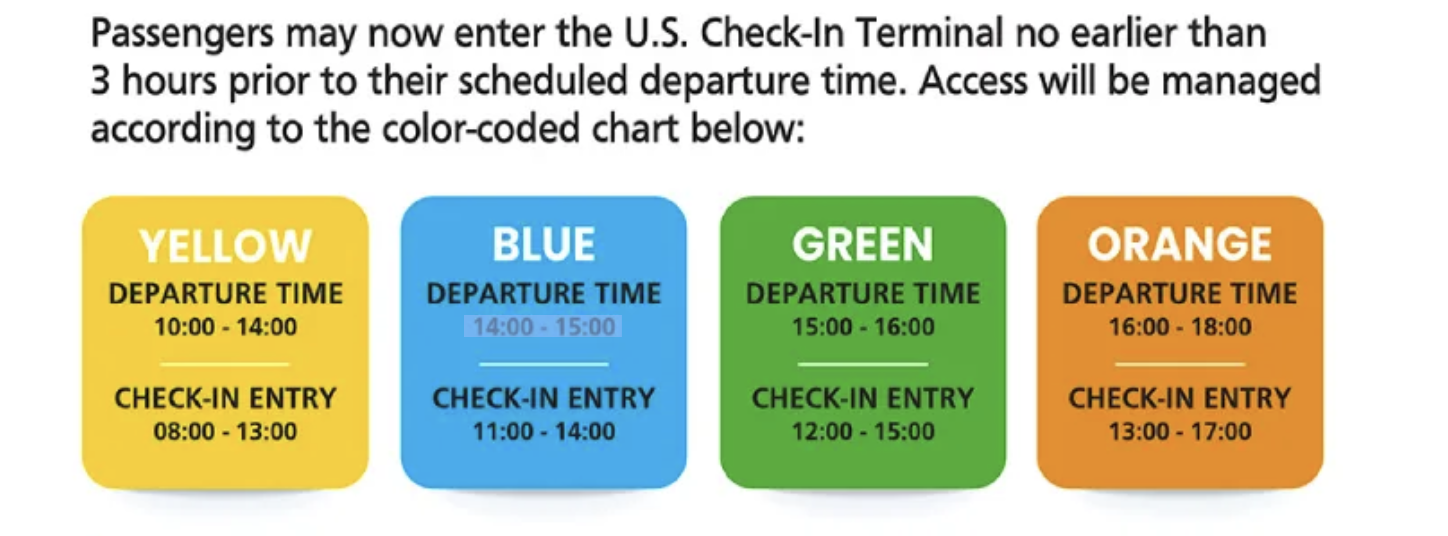
So if your flight to the U.S. is at 2:30 p.m., you’ll be in the Blue group and can enter between 11:00 a.m. and 2:00 p.m.
The Aruba U.S. Departure Process: Step-by-Step
1. Airline Check-In
A day after we applied for Aruba’s mandatory Embarkation/Disembarkation (ED) card, we received an email with useful information about the departure process—specifically about when to arrive at the airport for U.S.-bound flights. The message explained that access to the U.S. Departures terminal is strictly controlled based on your flight’s departure time and color-coded time blocks. This system is in place to prevent overcrowding inside the terminal.
When we arrived, security guards were stationed outside the building, checking boarding passes or reservations. If your flight wasn’t within the currently allowed check-in window, you weren’t getting in.
Once we were allowed inside, the check-in process felt familiar—but with one notable difference: we weren’t allowed to print bag tags at a kiosk. Instead, we had to go to the staffed counter and work directly with an airline agent. That slowed things down a bit, but overall, the process was smooth and organized. After checking in and tagging our bags, we exited the building and followed signs toward Aruba Immigration.
2. Passport Control & Aruba Immigration
As we’ve found in many countries, there’s a process for officially leaving the country. The United States is one of the few places where you can board an international flight without an outbound immigration check. But in Aruba, you’ll go through passport control when exiting the country.
For eligible passport holders, there are E-Gates where you simply scan your passport and boarding pass. The system then captures your photo, and if everything checks out, the gates open and you’re done.
If the system can’t verify your information—or if you’re from a country not eligible for automated processing—you’ll need to speak to an immigration officer. But during our visit, the e-gates worked flawlessly, and we were through in under a minute.
3. Security Screening
As we walked away from Aruba Immigration, I overheard someone in the group behind us say, “Is that it?” They sounded surprised at how fast the process had been so far. It probably felt like we were almost finished. I turned around and let them know: “Nope—this is just the first of several checkpoints.” And sure enough, next up was security screening.
Unlike U.S. airports, there are no TSA PreCheck lanes in Aruba. Everyone goes through the same standard security line. Here’s what you can expect:
- Shoes off – All shoes must be screened, so be prepared to remove them and place them in a bin or directly on the x-ray belt.
- Laptops out – Laptops must be removed from their cases and placed separately in a tray. Aruba Airport even recommends attaching a label with your name and contact info to the bottom of your device.
- Other electronics – Mobile phones, tablets, CD players (if you’re still living in 2004), and other electronics should be placed in your carry-on bag for screening.
- Metal items – Keys, coins, belts with large buckles, jewelry, watches, and clothing with metal accents can set off the detectors. It’s best to stow as much of that as possible in your bag before stepping into the line.
The security staff was efficient and professional, but since there’s no expedited screening, this step can take a little longer during peak hours. Plan accordingly—especially if you’re traveling in one of the later departure windows, when multiple U.S. flights leave close together.
4. U.S. Customs and Border Protection (CBP)
After clearing Aruba security, we headed toward the U.S. Customs and Border Protection (CBP) Preclearance area. When we arrived, we were pleasantly surprised—there wasn’t a long line at all.
CBP agents were actively promoting the Mobile Passport Control app, encouraging passengers to download and use it to expedite the process. But since we have Global Entry, we skipped the app and went straight to the dedicated kiosks. We were the only ones using them, which made the experience even faster. In less than 30 seconds, we finished scanning and walked toward the CBP officers.
As we approached, our names were called, and after a quick glance and brief confirmation, the officer said, “You’re all set.” And that was it—we were officially done with immigration while still in Aruba.
5. Proceed to Your Departure Gate
Once you pass through CBP, you enter the U.S. Departures terminal—and at that point, there’s no turning back. Because you’re considered to have entered the U.S., you’re not allowed to exit this secure area or return to any other part of the airport.
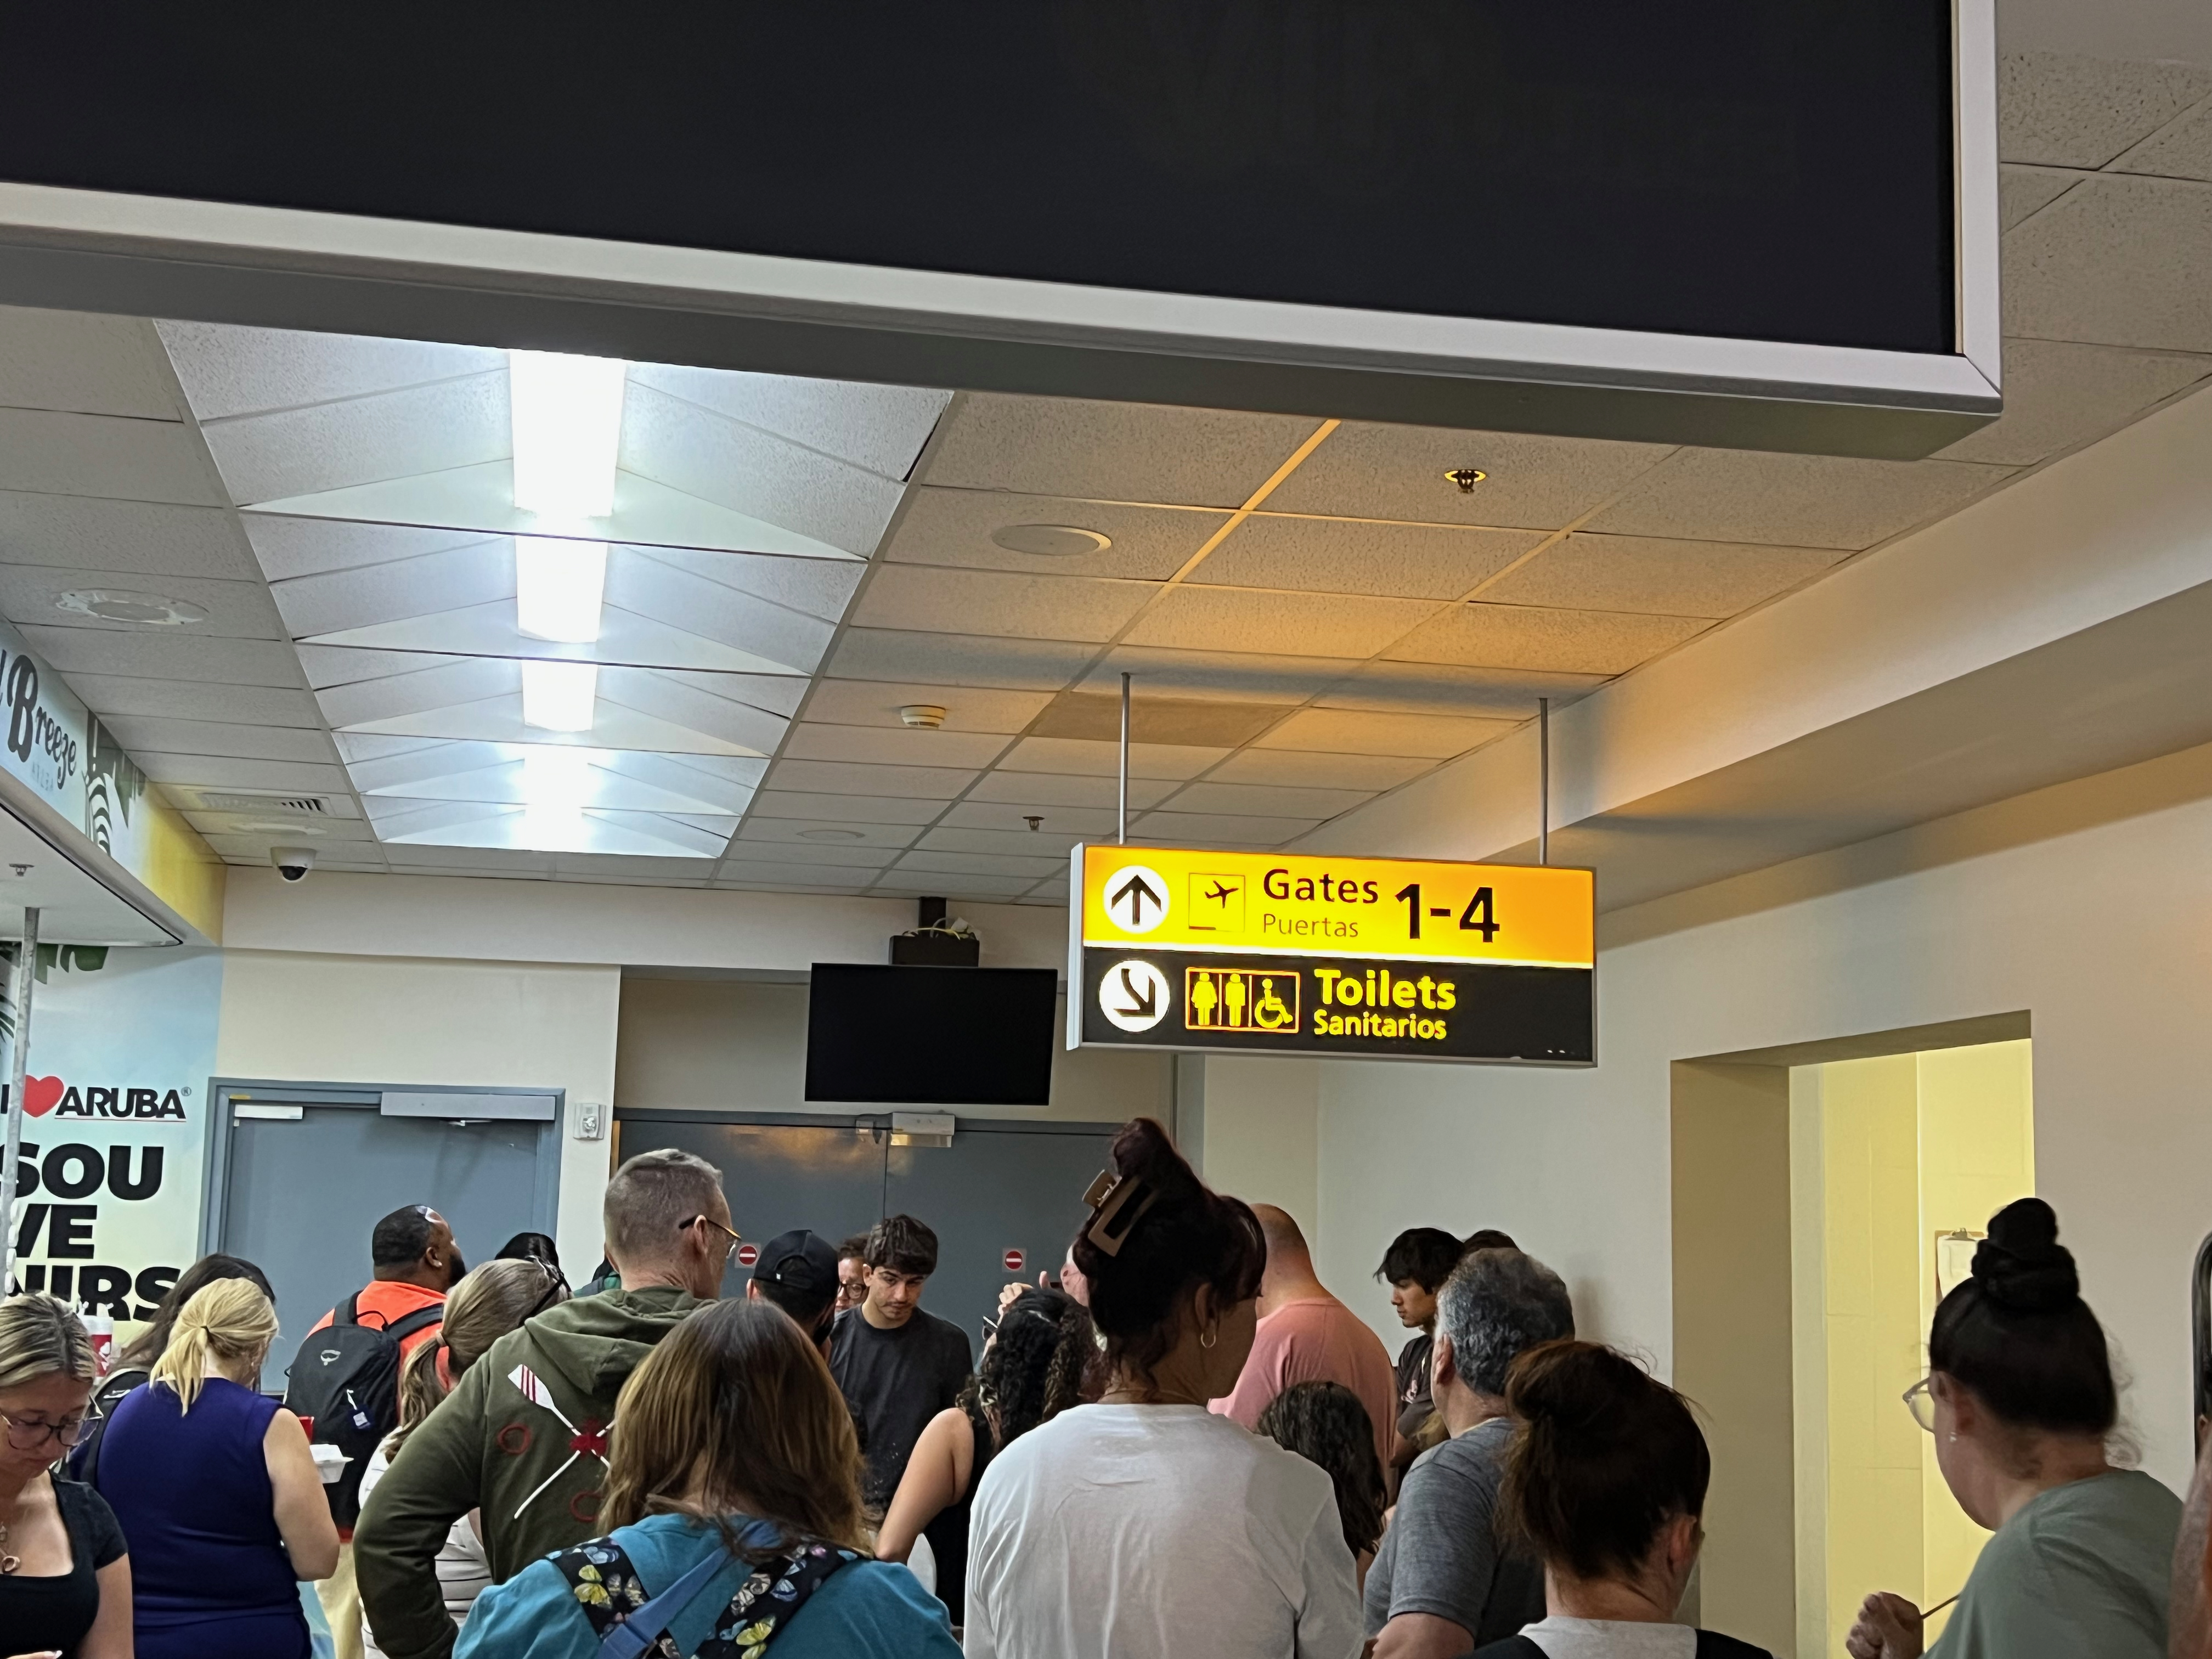
This part of the terminal definitely has a different feel. It’s crowded, and honestly, it already feels like you’re back in the States. You’ll find familiar fast food options like Auntie Anne’s Pretzels, Nathan’s Famous Hot Dogs, and Panda Express, along with a few shops where you can grab last-minute souvenirs or snacks.
While I’ll write a separate post about the terminal experience, I’ll say this: the Preclearance process itself was a positive one. Everything moved quickly, and the multiple checkpoints didn’t feel overwhelming once we understood the flow.
The biggest perk? We landed in Orlando, walked straight off the plane, and didn’t have to deal with U.S. immigration at all. And if you’ve flown into MCO before, you know how valuable that is. Our checked bags were delivered to the regular baggage claim area, and we were on our way home within 30 minutes of landing.
Want to comment on this post? Great! Read this first to help ensure it gets approved.
Want to sponsor a post, write something for Your Mileage May Vary, or put ads on our site? Click here for more info.
Like this post? Please share it! We have plenty more just like it and would love it if you decided to hang around and sign up to get emailed notifications of when we post.
Whether you’ve read our articles before or this is the first time you’re stopping by, we’re really glad you’re here and hope you come back to visit again!
This post first appeared on Your Mileage May Vary
